Pageviews past week

Powered by Blogger.

Monday, March 24, 2014

Maison Blanche Kitchen Cabinet Makeover!


We bought this house about 2.5 years ago, and the kitchen had builders grade oak cabinets.  I have longed to paint them, and scoured the internet for ideas on how to easily do that over the past couple of years.
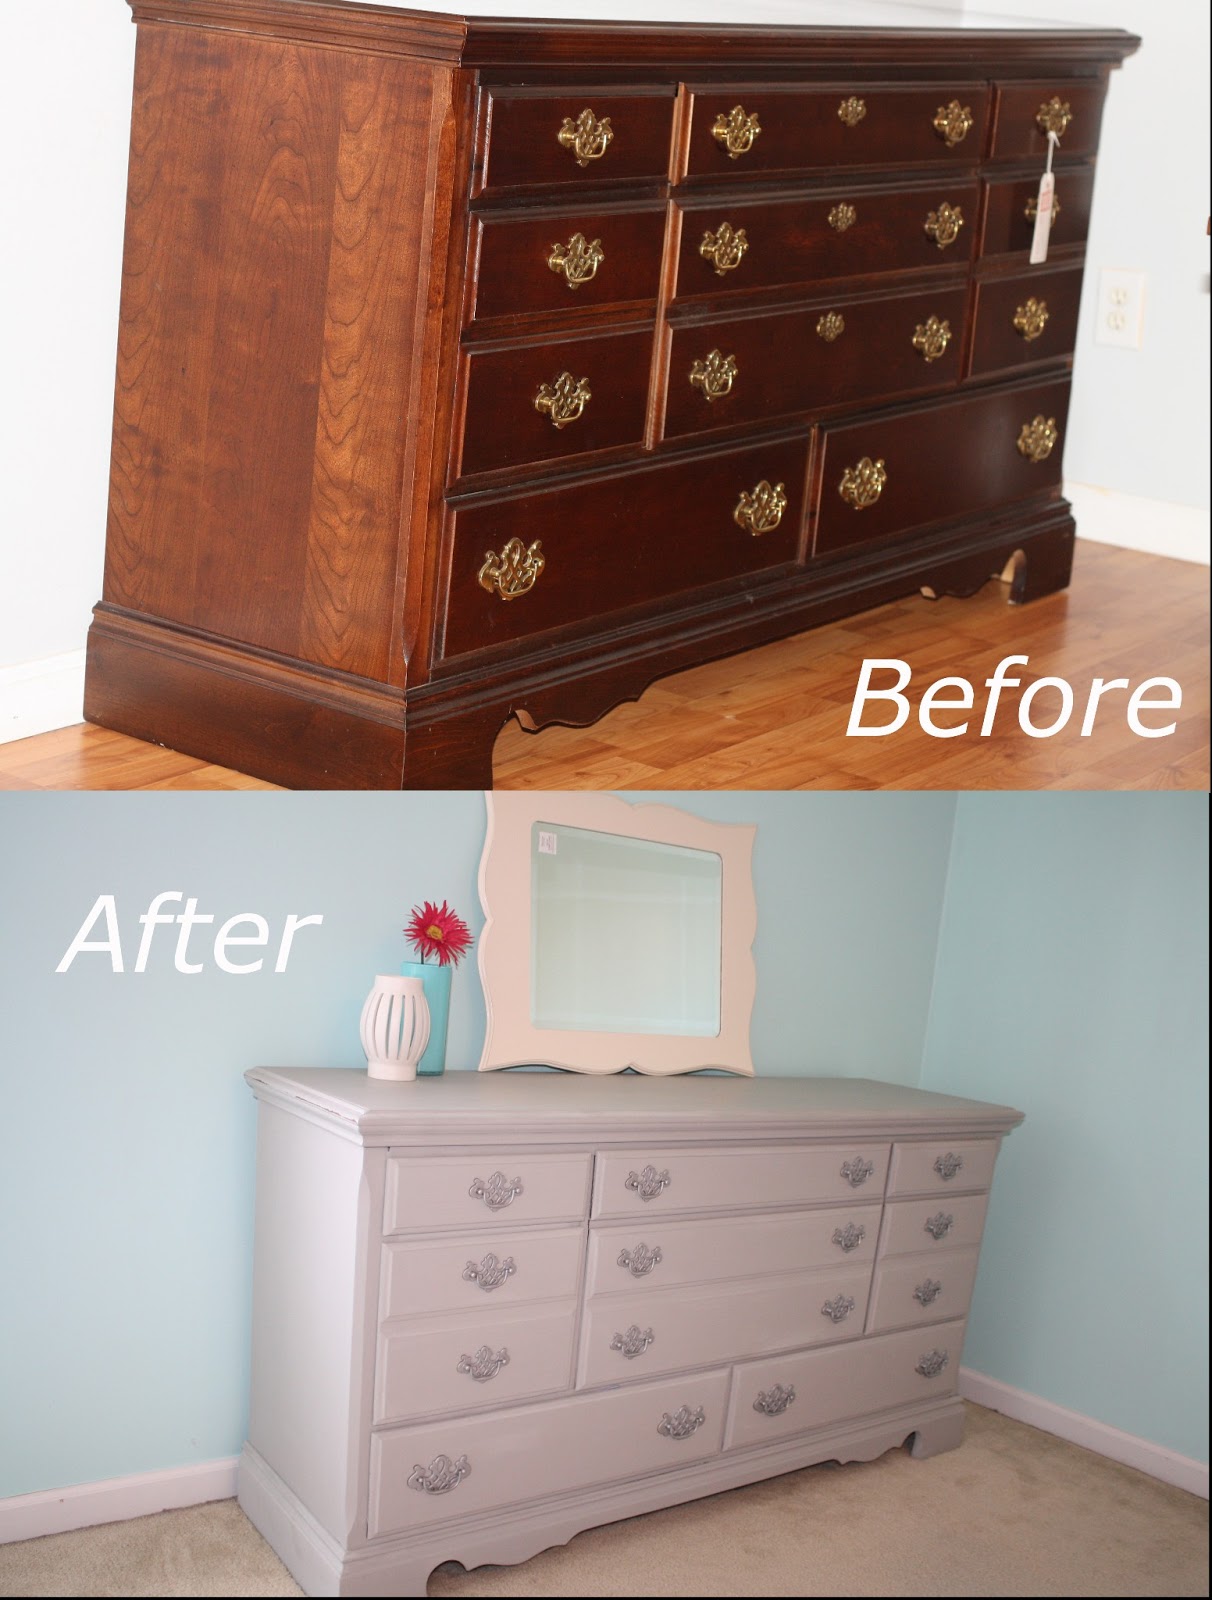
It was when I  refinished a dresser a year ago, that I realized chalk paint might be our best bet. 
The thought of being out of a kitchen for possibly weeks while taking care of our 3 and 5 year old was almost enough to make me like those oak cabinets as they were (almost, still not quite enough).
Using Maison Blanche's la craie paint on our dresser was so super easy, I finally dove head first into doing the kitchen!

Here are some pictures right after we bought the house:


Dark, boring, small... a lot of words come to mind.

Here are most of the supplies we purchased:

 2 quarts of Maison Blanche Silver Mink furniture paint
Maison Blanche Satin Varnish
A 2 inch angled Purdy brush
Painters tape
A drop cloth
Behr ultra plus paint with primer in Milkpail by martha stewart
Rustoleum Satin Nickel spray paint for the hinges
Cabinet drawer pulls
Cabinet knobs
Clorox wipes

I took all of the cabinets off of the hinges and scrubbed them really well with the wipes, if there are any grease spots remaining your paint will yellow in spots.  Then they all got wiped down with a damp cloth to be sure there was no remaining soap residue.
Once they had time to dry (I took that time to run to the store for supplies), I applied a coat of paint to all of the doors and trim, and once the doors were dry I applied the paint to the back of the doors.
This paint is very very quick drying, so you need to work quickly, but it meant that by the time I had my first coat done I was ready to go back and do the second coat.
Once the second coat was on, the paint needed at least 24 hours to cure.  I made note of which pieces were finished earlier than others so I could start varnishing asap. At this point, the silver mink color was lighter and not nearly as neutral as I expected, I was worried, but carried on. Once I started applying the varnish the color of the paint changed to the color I was actually expecting. ***Happy Dance ( and a glass of wine)*** The varnish was the consistency of milk, and was very easy to apply.  The only issue I had was occasional drips forming, and this was really a non issue.
The first coat of varnish also dries very quickly, and then our second coat was applied.
My lovely husband drilled and installed the hardware.  I spray painted the existing hardware.  And we jointly painted the kitchen and adjacent laundry room/half bath.   It took 3.5 days and very little sleep, but we were finally finished!  (For now!  The lighting, sink, faucet, flooring, and eventually appliances need replaced too, but this is a big starting step!)


We are so happy with the results! 

Thanks for visiting!
If you have any questions about the process just let me know!

Monday, February 18, 2013

Maison Blanche Chalk Paint Tutorial ~ Dresser Redo

  I'm about to share one of my new favorite products with you!
Maison Blanche's La Craie Paint.

It. Is. Amazing.

I've been wanting to try chalk paint for a while, and I've heard of another brand that's been used buy a lot of people lately, called Annie Sloan.  I was searching Knoxville for a nice dresser  to redo or our master bedroom makeover (to be revealed later...) and I ended up in a furniture store here called Consign to Design.  I not only found my dresser, but they are also the local retailer for Maison Blanche Paint and Waxes.  I asked the girl about the consistency of the paint and I was told that it tends to be thicker than Annie Sloane.  I hadn't tried either, but I was definitely going for a more covered look so I figured thicker would be best.  I bought the dresser, and also left with a quart of La Craie in Franciscan gray, and a container of Maison Blanche's clear Antique wax.

I started working on the dresser at eight o'clock at night after the kids were put to bed.  There is no sanding needed at all, even on this lacquered dresser.
I removed all of the hardware.  I swiped a barely damp rag across the front of the drawers where the hardware was removed, just to remove the dust that had built up.

I spread a painting drop cloth out, since I was working in the living room.  It was freezing in the garage.

I shook the can quite a bit to get it mixed up well, and then we stirred the paint.

I was advised that it was good to use a Purdy brush, and though I'm sure it's great to use one if you have one, I did not.  I was coming in right on budget for my dresser and didn't feel like spending another $15 on a brush.  I used a cheap $3 economy brush from Lowes.

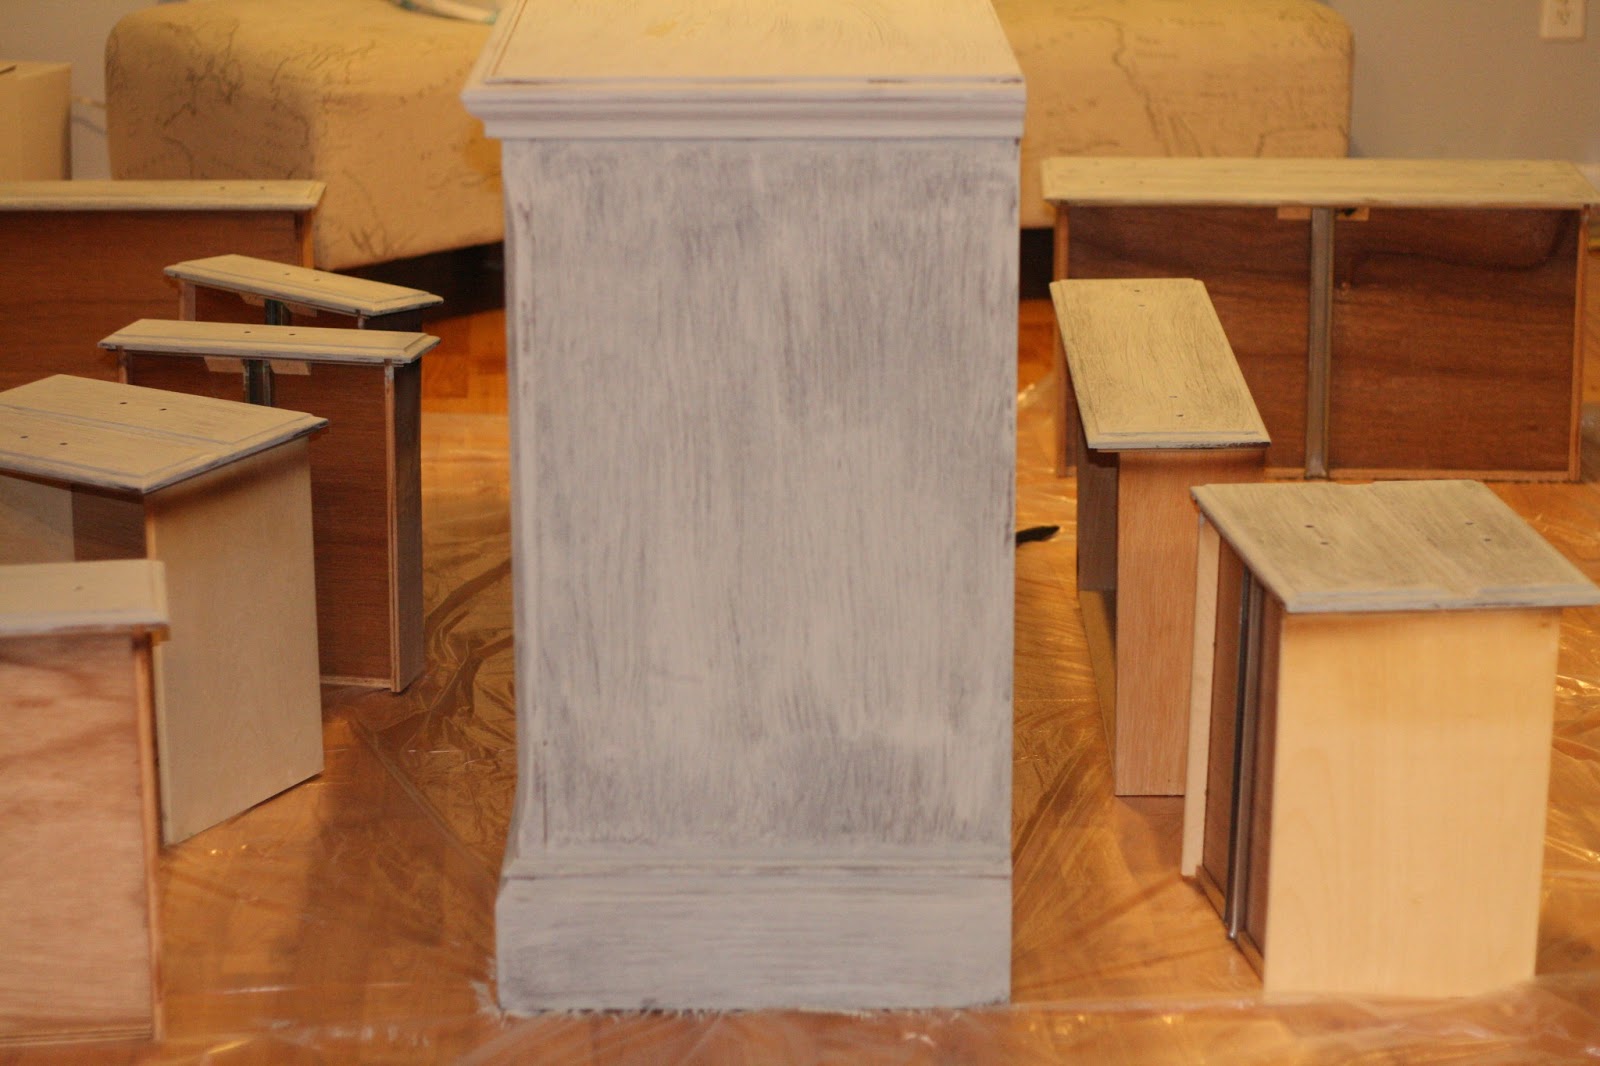
I first applied a very thin, and I mean, very thin, layer of paint, all over the dresser and drawer fronts.  I used so little paint that you could barely tell there was any missing from the can.  If you were painting a lighter color piece of furniture, or if you weren't going for a very covered look, you could have possibly skipped this. I wanted to be sure that it wouldn't end up streaky though.  You can see it looks pretty rough here, but for the teensy tiny amount of paint used, the coverage is astounding.
I let the first thin coat dry for about 30 mins, it was such a small amount of paint that it dried amazingly fast.  I  then started on the next coat.  I applied the paint fairly heavily, as I wasn't going for too much of a distressed look.  The paint went on extremely easily and smoothly.  I let it dry overnight, and it was dry by morning.

The next morning I took my clean brush, and applied the wax.  It is firm, as you can kind of see in the picture here.  I just swipe the brush over the wax a few times, and then swipe it onto the dresser.

It just ever so slightly leaves a color difference, so you can tell how smooth it is going on.   They also sell a brown version of the wax if you are going for a more weathered or distressed look.

Once the wax was applied, I let it sit for about 15 minutes, and then quickly buffed over the surfaces with a dry rag.

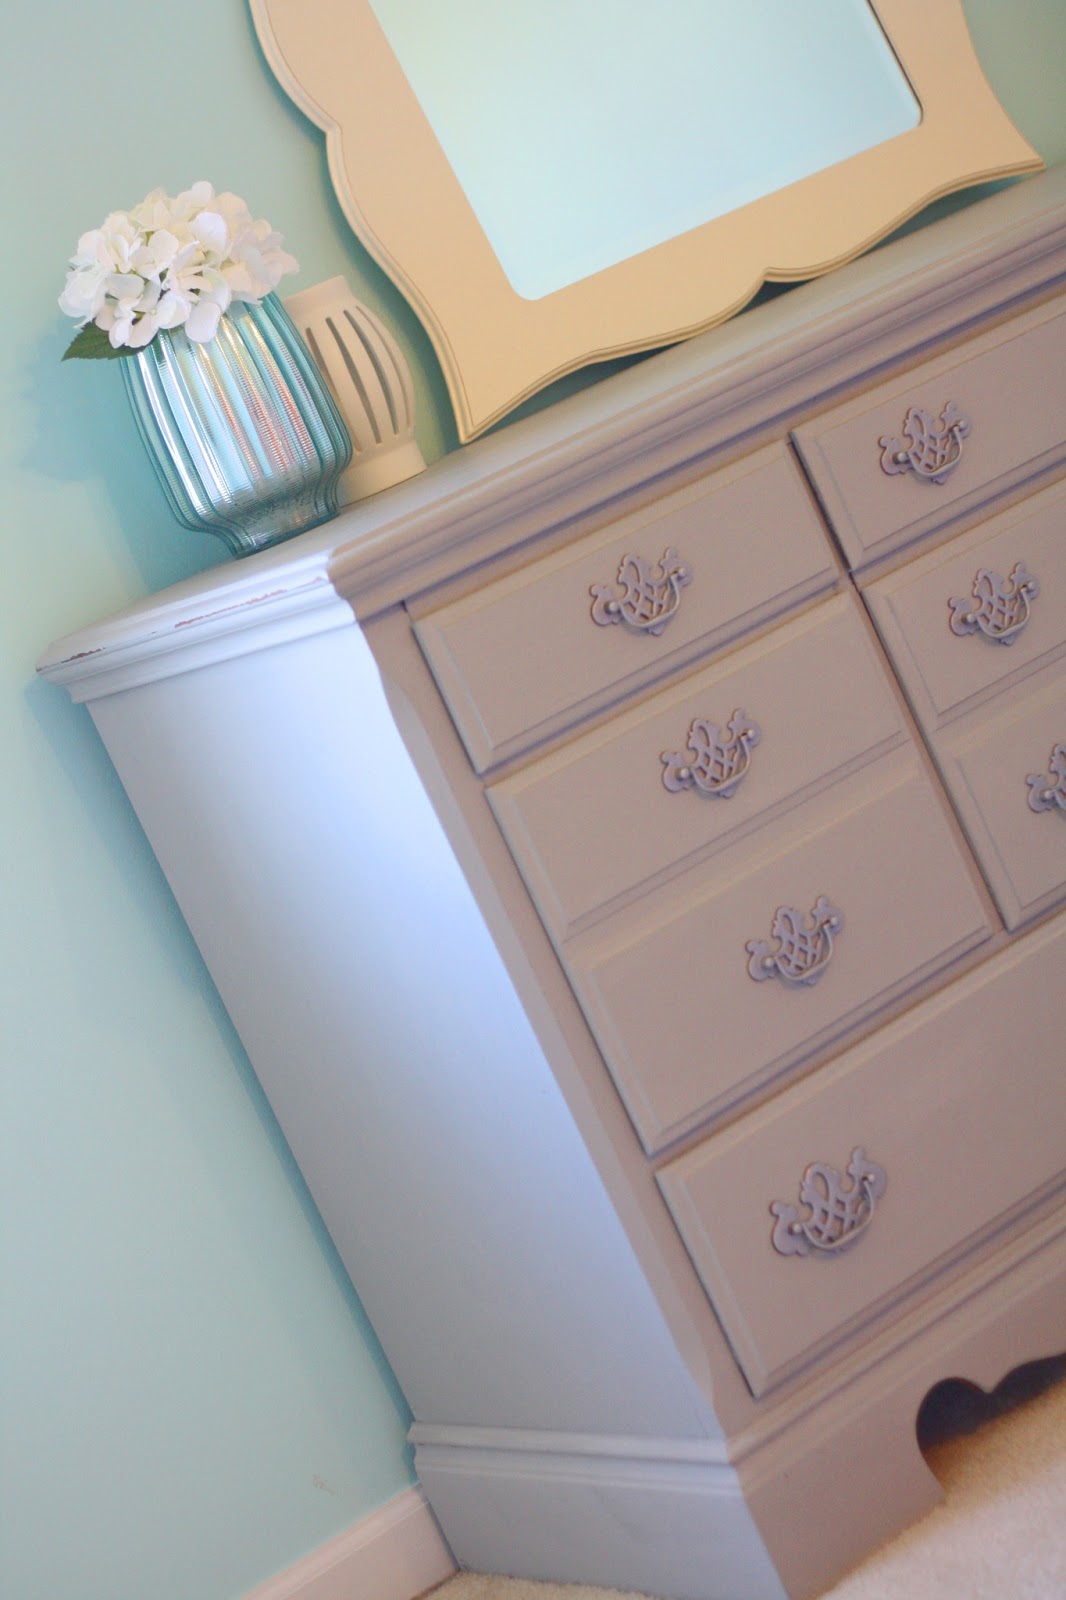
I spray painted the hardware with some Rustoleum metallic flat nickel.


We put the hardware back on, and it was ready to move to our room!


Sunday, February 3, 2013

{Meal Plan and New Recipes}

I'm a little late this week, but here's the plan for this weeks meals.
We are waiting for the superbowl to start and I'm ready to start eating!

{Chicken marsala with mashed red potatoes and green beans.  }
http://www.womenshealthmag.com/nutrition/chicken-recipe

{Superbowl food-  Buffalo chicken dip , guacamole and soft pretzels.  }
      Buffalo chicken dip:  1c Franks buffalo sauce, 8oz soft cream cheese, 1c cheddar cheese, chopped cooked chicken, 1/4c bleu cheese (optional).  Mix all and bake at 350 till bubbly. 
      Pretzels:  This recipe, but bring water and soda to a boil and drop the dough in for 30secs to 1min, then remove. 
http://www.food.com/recipe/auntie-annes-pretzels-copycat-59462

{Chicken baked with peaches, brown rice, corn.  }

{Quinoa mixed with organic sauteed black beans, corn, onion.  Topped with avocado, cilantro and salsa. }

{Trader Joe's Mandarin orange frozen chicken mixed with broccoli and rice.  }

{Chicken, pepper, onion, pineapple kabobs with a Chickpea, spinach, tomato side and French bread }
http://mrsbrechtl.blogspot.com/2012/03/chickpeas-or-garbanzo-beans.html

{Chicken artichoke pasta with French bread }
This recipe with organic whole wheat pasta:  http://www.yumsugar.com/Recipe-Chicken-Artichokes-Angel-Hair-10967770
This French bread recipe: http://www.dealstomeals.blogspot.com/2009/03/blog-post_09.html

Breakfast:
Organic cereal, oatmeal, Greek yogurt pancakes, eggs and homemade 'mcmuffins'.

Lunches and snacks:  PBJ's, ham sandwiches, crackers, mangos, bananas, apples, cookies, yogurt. 

Thursday, January 24, 2013

*Weekly Meal Planning*

I'm getting back on track this week, we really did eat last week, but we had snow days so our meal plan was all over the place! 

This week I'm going with an easier menu, I'm getting a little burnt out with cooking for what feels like hours every afternoon. I think a week or two of easier but healthy meals will take a load off of me, and we can all use that sometimes, right?

{ Roasted chicken with herbed quinoa and green beans. }

{ Spelt pasta with garlic marinara and chicken meatballs, with a salad. }

{ Quinoa with black beans, corn , onion, avocado and salsa.  }

{ Black bean and sweet potato chili over quinoa. (We will probably have leftovers on a night that is rushed.) }

{ Salad with grilled chicken, avocado, cucumber, tossed with some of the black bean and corn quinoa. }

{ Vegetarian hot dogs with broccoli. }

{ Ground chicken burgers on homemade buns with baked sweet potato fries. }

    For breakfasts we will be having oatmeal, cereal, and Greek yogurt pancakes.  Check out this recipe for the pancakes, they are GREAT!  ( Thin the batter out a little with some almond milk, milk, water, what have you...) 
http://www.familyfreshmeals.com/2013/01/greek-yogurt-pancakes.html

For lunches, the kids will eat PB sandwiches of various sorts (jelly, banana, honey..) Mac and cheese, fruit, crackers, etc.   We aren't very creative for lunch.

I will have curry chicken salad on flax crackers or a protein shake.   Check out the curry chicken salad recipe here : 
http://www.familyfreshmeals.com/2013/01/curried-chicken-salad-for-lunch.html#more-2289

And that is that! 

On a separate note ,  my almost 4 year old has been enrolled for pre K this fall!  How time flies!  When he was born it seemed like an eternity before we would be thinking about school, and now it's right around the corner.   Thankfully, of my two boys, he will be the easiest when it comes to starting school.  He begs to go all the time!   And I'm getting excited, looking at little backpacks, lunch boxes, snack bags, lunch ideas..
It's going to be a whole new world for both of us!
Look at that cute face... 


Monday, January 7, 2013

** White Whole Wheat Bread - THE BEST! **

I have been trying to bake most of our bread lately, as we've been trying to eat more natural foods, and that adds up to more $$.  Though reducing the cost of breads isn't a lot, it's something.

I have tried several whole wheat bread recipes, and some have been okay, but just okay.  They always end up too crumbly , dry or dense.  I've tried using my bread machine for the kneading. I've tried kneading by hand.  The only thing I've found that helped was using a recipe that added white flour to the whole wheat, and I'm trying to stay away from that. 

Until this recipe.  I've made two batches, two different ways, and both were amazing.  And yes ,  it's a recipe for 100%whole wheat! And yes again, it involves NO kneading!

To rise , I turn my oven light on  then turn the oven to WARM / 170F , for about 10 seconds, just until the coils start to get warm, then I turn it off.  It creates a cozy, warm environment for the bread to proof, and the oven keeps the warmth in.

Make sure you are using newer yeast as this recipe doesn't call for it to be proofed before mixing it in.

This recipe makes two loaves, but it's easily halved. 

If you aren't sure of the difference between sticky and tacky, look here first :   http://yumarama.com/1644/sticky-vs-tacky-dough/
You do not want your whole wheat dough to be as dry as a dough with white flour would be.

I highly recommend using King Arthur's White Whole Wheat flour.  I much prefer the texture over regular whole wheat.

I have incorporated up to half white flour , half white whole wheat in this recipe when I ran out of white whole wheat. It yielded a lovely , old country style bread.

Ingredients:

2 3/4 cups hot water

1/3 cup olive oil, any oil is fine

1/3 cup honey (I've used white sugar)

2 tablespoons molasses (use pancake syrup if you don't have molasses)

1 tablespoon salt

7 1/2 cups of 100% whole grain wheat flour

2 tablespoons dry active yeast

1         Place the first five ingredients in the bowl and mix.

2          Add: 2 Cups 100% White Whole Wheat Flour. (to cool the water and end up with warm dough) Mix then add 2 Tbs of Dry Active Yeast.

3          Add: 4 Cups of 100% White Whole Wheat Flour.

4          Mix until the consistency is some what even. Then continue to slowly add flour 1/2 Cup at a time until the dough quits sticking to the sides of the bowl. It should be tacky to the touch. The trick is to have enough consistency to stand up with the least amount of flour so the bread will be fluffy. Do not exceed 7 1/2 cups of wheat flour. You can trade one cup of wheat flour for one cup of all purpose white if you wish. Don't over mix or the bread will be tough.

5        When your dough is finished, leave it in the mixer, cover the bowl and let it rise for about 30-45 minutes. The dough will be larger but it doesn't need to double.

6         Grease two bread pans with Crisco. You can also flour the pans to reduce sticking.

7         Mix the dough again just enough to knock it down at least close to the original size.

8          Drop the dough on a floured surface so you can work the dough and shape it. Shape it with your hands to make a nice ball getting enough flour on it so it isn't sticky. Divide the ball in half and do it again. Shape the loaves by turning the dough under it's self over and over. When the dough is shaped the sides and ends will be sealed and all you will see is a nice oblong shaped loaf with smooth sides and top. Drop the loaves in your bread pans and let them rise until almost doubled. Bake in a preheated oven at 350 for 36 minutes. If you forgot to preheat 41 minutes. (gas oven).

9        When done turn the bread out of the pan to a rack to cool. You can eat it right away (a great time for real butter) don't wrap it until completely cooled. (Condensation will make it soggy) Put in tinfoil to store on the counter. If you put it in the refrigerator it will turn into a rock.

Original recipe Here : http://www.food.com/recipe/100-whole-grain-wheat-bread-181106

Thursday, January 3, 2013

* Weekly Menu Plan *

I want feeling too creative today, so here it goes.. 

*Tofu curry with whole grain brown rice, salad  and steamed broccoli. *

*Veggie Dogs (trader joes) on homemade buns with baked beans and homemade slaw. *

*Buffalo chicken (mock Mac n cheese) quinoa with salad.*
http://traceysculinaryadventures.blogspot.com/2012/10/buffalo-chicken-quinoa-mac-and-cheese.html

*Chicken ranchero taco soup with corn muffins.*
Chicken , cooked
2 cans organic black beans, rinsed and drained.
1 can chili ready diced tomatoes
1 can cream of chicken soup
1 small can enchilada sauce
1 can corn (or heated frozen/fresh)
1 can chicken broth
1 packet of ranch dressing mix
Throw together in the crock pot and cook on high for 4 hours.  Garnish with Cheese and Cilantro if desired.

*Chicken burgers with sweet potato fries and organic mixed steamed veggies. *

For lunch the kids have PBJs (we bake the bread) , Mac and cheese, leftovers, etc
For my lunches , I have salads with grilled sweet apple chicken sausages , and protein shakes.

Right now I'm working on cooking the Tofitas (tofu fajitas) with onions, peppers and mushrooms. And a side of black beans and corn.  From last weeks menu.
And I'm starving!

Tuesday, January 1, 2013

Whole Wheat Pancakes

This is my go to pancake recipe.  The use of White whole wheat makes it a healthier alternative, but you can also use white four for one of the best pancakes you've ever eaten!

1c Flour (White Whole Wheat)
1 t baking powder
1/2 t baking soda
1/2 t salt
2 T sugar
1 c buttermilk
1 egg
2 T melted butter

Wisk the flour, baking powder, soda, salt and sugar in a large bowl 
Beat the milk and egg together.
Mix the wet ingredients into the dry, when partly mixed add the melted butter.
Then add 1/4 c or so of water , till your mix is a thinner pancake batter with no lumps.  Cook on a griddle. 
We love to mix chopped banana or frozen blueberries into the batter.

These are delicious!

Monday, December 31, 2012

Tofu Parmesan Recipe!

This is my absolute favorite way to cook tofu!  It brings the tofu close enough to the texture of chicken that most people wouldn't realize that they aren't eating chicken right away.

Extra Firm Tofu
1 jar Pasta sauce
Whole wheat spaghetti, cooked
Ricotta
Mozzarella, shredded
Bread crumbs
Eggs

Slice your tofu into about 1/3 inch thick slices, starting at the short end.  Arrange them on a cutting board, freeze for 20 mins.
Whisk a couple of eggs in one bowl, and about 1c of seasoned bread crumbs in another.  Add salt and pepper to taste.
Dip the tofu in the egg, then coat with the bread crumbs.  Lay onto a baking sheet.
Bake at 375F til golden brown and crisping up a little.
Spread a small amount of pasta sauce into a baking dish , then layer Tofu, ricotta, pasta sauce, shredded mozzarella, tofu, ricotta, pasta sauce, mozzarella.
Bake at 375F till the cheese is melted and browning around the edges.
Serve with the pasta tossed in leftover pasta sauce.
Enjoy!


{ Weekly Meal Plan }

* Grilled chicken bleu cheese avocado salads with sweet potato fries. *
Fry recipe here:
http://www.instructables.com/id/Perfect-Oven-Sweet-Potato-Fries/

* Tofu fajitas with black beans and corn. *
Tofu fajita recipe here:
http://mexican.food.com/recipe/tofu-fajitas-61406
And how to cook your tofu first:  cut it into half inch by 2 inch strips, lay all pieces side by side on your cutting board.  Place in the freezer for about 20 min.  Remove and toss in enchilada sauce.  Let sit 5 min.  Move to baking sheet, bake at 375F for 15 mins, turn, and bake another 15 min.

* Grilled tilapia with chimol , herbed quinoa and steamed spinach. *
Chimol recipe here:
http://diaryofaglammommy.blogspot.com/2011/05/its-not-pico-de-galo-its-chimol.html

* Sun dried tomato chicken sausages (Trader Joe's) with herbed quinoa and brussel sprouts. *

*Breaded, baked Tilapia nuggets with mashed cauliflower and steamed veggies. *
Mashed cauliflower recipe , here:
http://www.foodnetwork.com/recipes/george-stella/mock-garlic-mashed-potatoes-recipe/index.html

*Quinoa and kale patties with leftover steamed veggies and sliced farmers cheese from the coop. *
Quinoa and kale Patties recipe here: 
http://yummysupper.blogspot.com/2012/09/quinoa-kale-patties.html

And some pictures from last week...


Monday, December 24, 2012

*Weekly Meal Plan*

I can't help but feel a little fickle.  I never seem to keep up with my blog.   But I'm going to give it another shot ;-)

We've been making an effort to eat healthier and incorporate more all natural and organic foods into our menus.

Finding all natural and organic foods that fit a budget can be difficult, and I'm so thankful that a Trader Joe's has opened up near us.

This weeks meals are as follows , though in no particular order ...

Homemade Pizza with Avocado Bacon Bleu Cheese Salad.  Using this dough recipe.  
http://www.foodnetwork.com/recipes/mario-batali/pizza-dough-recipe/index.html

Tofu Parmesan with spaghetti and salad.

Tilapia with brussel sprouts and herbed quinoa.    I cook the quinoa according to instructions, then saute onion, garlic, fresh Italian parsley and dried thyme in EVOO, add some lemon juice, and fluff it into the quinoa.   I do this for any recipe that uses quinoa.

Chicken burgers (ground chicken, breadcrumbs, egg, seasonings, shaped and grilled) on homemade buns with steamed spinach.  I use this bun recipe: http://allrecipes.com/recipe/hamburger-buns/detail.aspx

Sweet potato and black bean chili over whole grain rice with salad. Chili recipe here:  http://www.tasteofhome.com/Recipes/Sweet-Potato---Black-Bean-Chili

Quinoa and kale patties with mixed veggies and farmers cheese.

We bake white whole wheat bread to use for pbj sandwiches , and the kids alternate between cereal, oatmeal with raisins and bananas, pancakes, etc for breakfast.

Below was my grocery list with an estimate of cost, I ended up spending about $80.  We already had some things on hand, like frozen tilapia, and staples like oatmeal, quinoa, flour, butter, rice, etc.

I bought most of our food at Trader Joe's, then follow up with Krogers for items that I know will be substantially cheaper or that aren't available at Trader Joe's.

Cereal , organic 2.50
Milk 3.30
Juice 2.00
Sugar 2.50
Eggs , organic 2.79
Marinara sauce, organic 1.99
Cheese 2.00
Mushrooms, organic 2.00
Salad  2.00
ground chicken  3.50
Tomatoes 2.00
Pickles, organic 2.00
Organic frozen spinach 1.70
Organic frozen Mixed veggies 1.70
Salad 2.00
Tofu , organic 2.00
Spaghetti , whole wheat, organic 1.40
Cheese 1.88
Organic pasta sauce 2.50
Ricotta  2.50
2 Onions 1.60
Bag of sweet potatoes 1.89
2 cans organic black beans 2.40
Can of fire roasted tomato 1.00
Cheese 1.88
Coffee, organic fair trade 8.00
Salad 2.00
Pears, bananas, apples 4.00
Natural peanut butter 2.50
Garlic .50
parsley 1.00

Please comment with your menu!!

Sunday, December 23, 2012

BOB Stroller giveaway at Ascending Butterfly!

Ascending Butterfly is giving away a BOB stroller to one lucky winner!  
Check it out here:  http://www.ascendingbutterfly.com/2012/12/bob-stroller-from-britax-holiday.html

Thursday, October 4, 2012

{Williams Sonoma Crumb Top Blueberry Muffins}

I use this recipe all the time!  Super easy and quick.  You could also sub frozen raspberries for blueberries...hmmm... Maybe next time?
I also sometimes omit the topping, or just lightly dust with cinnamon sugar.

Topping:
2 1/2 tablespoons all-purpose flour

2 tablespoons granulated sugar

2 tablespoons light brown sugar

1/2 teaspoon ground cinnamon

1/8 teaspoon ground mace (I use nutmeg)

Muffins:

2 tablespoons cold unsalted butter

2 cups all-purpose flour

1/4 cup granulated sugar

1/4 cup light brown sugar (firmly packed)

1 tablespoon baking powder

1 teaspoon baking soda

1/4 teaspoon salt

1 orange, zest of, grated

2 large eggs

5 tablespoons unsalted butter, melted, plus extra for greasing

1 teaspoon vanilla extract

1 cup buttermilk (I use the buttermilk substitute from this site)

1 1/2 cups blueberries (fresh or frozen)

Preheat the oven to 375. Have ready one 12-cup muffin pan. Grease 10 of the cups and fill any unused cups with water to prevent warping. (I usually grease all 12).

To make the topping, in a small bowl, stir together the flour, sugars, cinnamon, and mace (or nutmeg). Cut the butter into pieces and, using a pastry blender or 2 knives, cut it into the dry ingredients until the mixture resembles coarse crumbs.

To make the muffins, stir together the flour, sugars, bakng powder, baking soda, salt and orange zest in a bowl.

In another bowl, whisk toghether the eggs, melted butter, vanilla, and buttermilk. Stir the butter milk mixture into the dry ingredients just until combined. The batter should be lumpy. Fold the blueberries into the batter just until evenly distributed. Scrape down the sides of the bowl.

Spoon the batter into each muffin cup, filling it level with the rim of the cup. Sprinkle each muffin with some crumb topping.

Bake until golden, dry, and springy to the touch, 20 -25 minutes. A cake tester inserted into the center of a muffin should come out clean. Let stand for 5 minutes, then remove each muffin from its cup with a small metal spatula. Serve warm.


Tuesday, October 2, 2012

{Chevron Tote Bag}

I made this beauty for a friend , along with the matching little zippered cosmetic bag.
I almost kept it.
It was made with inspiration from this one.
Isn't it cute!?


Monday, August 13, 2012

The Lunette Cup!

Ok, obviously I suck at keeping up with this blog, but lets put that aside for a minute.

 Ive got to share my excitement for a new product (at least new to me. The Lunette cup. The name sounds so cute , what could it be...?
A menstrual cup. Yep , that's right. Menstrual. Gone are the days of ill fitting tampons , diaper like pads. These are medical grade silicone cups , from Finland. Sounds high tech , huh?
 Here are some tidbits of info:
  Hygienic & Safe Lunette menstrual cup doesn’t absorb moisture like tampons or cause sweating like pads. Lunette is made of soft medical grade silicone, not of rubber latex.
  Economical The average woman spends between $48 – 84 per year on disposable tampons and pads. The Lunette is a one-time cost that will last for years. That saves you a chunk of money!
  Environmentally friendly A Lunette menstrual cup is an eco-thing. It will last for years and during the cup's lifespan, there will be no waste to dispose of – no accumulation of plastic applicators, wrappers or bio-waste from used tampons and pads.

 It also greatly reduces risks of TSS , as the silicone doesn't grow bacteria like tampons can. It can be left in for up to 12 hours (talk about saving on last moment bathroom rushes!)It can be worn overnight. This silicone is FDA approved.
It comes in 2 sizes , one is for those who have given birth or are over 30, the other is for those under 30 who have never given birth. I obviously went with the first option.
 And two of the biggest sellers for me: No more icky trash!!!! So much $$$ saved! One cup will last for years. I can only comfortably use one of the most expensive tampons , so this is a huge plus! Also, some other brands only come in clear, Lunette comes in different colors:
How Does It Work
You fold it over twice (shown in the manual below), and insert. It pops open, creating a seal. When you are ready to remove it, you pinch the bottom to break the seal, and empty contents in the toilet. It has a little 'tail' at the end, which can be left, or cut down to what size you want.

Now, Ive heard about various brands for years , but what always irked me is what you would do in public. After reading some, you simply wipe it out, using the Lunette single wrapped disinfecting wipes (pictured below) , or if the only thing at your disposal is toilet paper, use that. You can give it a good cleaning when you are home. And that means no sneaking around bathrooms with a wad in your hand trying to find a garbage when the feminine trash cans are absent in a stall (or god forbid no can in someones house).

 When you are done with your cycle you boil it ( or some run it through an empty dishwashers sani cycle), put it in its little bag and set aside until the next month.

  My experience: Not much yet. I just received it today and aunt flow has not arrived. I did try it out, and it seems like it will be perfect, it was super easy too insert on one try,definitely seemed to create a suction, the only thing that I could not too noticeably feel was the 'tail', and I can just trim it off. I'll definitely do a full review in a couple of weeks!

 Pictures!

The Lunette cup and the box of disinfecting wipes (purchased separtely)
Cute little box, pulls out of a sleeve:
The cup, its little bag, and the instructions:
The Lunette , and the Lunette next to a spool of thread:
Its little carrying bag.
Instructions:
Box of 10 wipes:
The Lunette cup retails for $39.99 , I was able to get it for around $35 on sale at SweetBottomsBaby with free shipping. Visit lunette.com for more info.

  I bought this product myself and received no compensation for this review.

Wednesday, June 6, 2012

Deck 'Refresh'

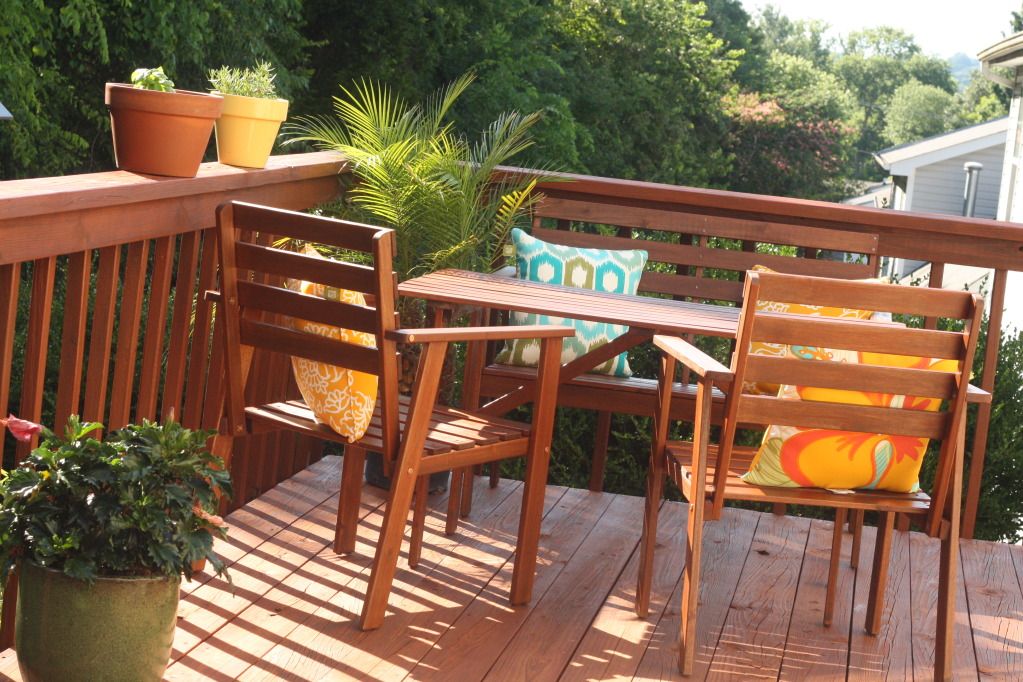
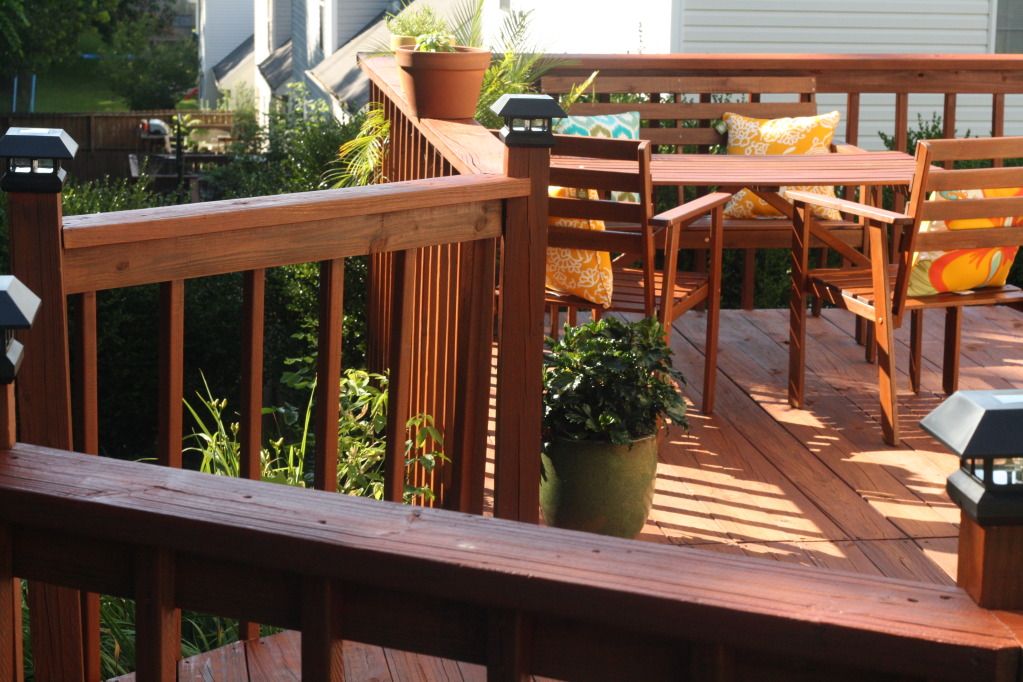
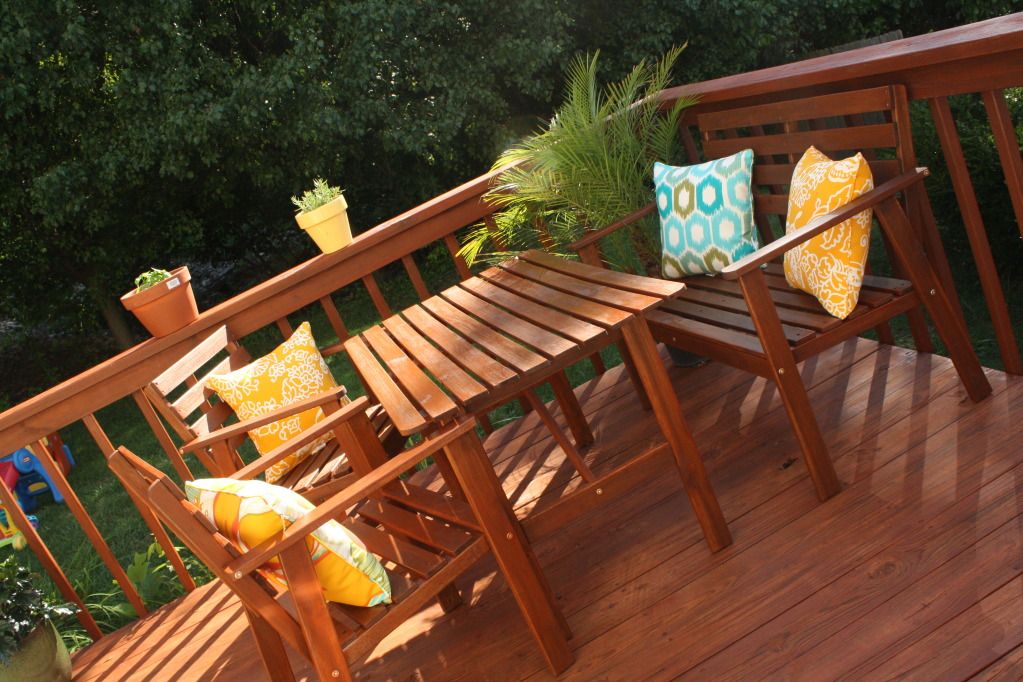
It has been way too long since I updated this blog, which I'm going to blame on . I'm now selling custom nursing covers, camera strap covers, boppy pillow covers AND little girl dresses, which will soon include some mommy and me sets. You should check it out. Really. Anyway, I found a blog that I'm loving, . Its a lovely mix of DIY projects, recipes ( check out the bananas foster bread spread, delicious!), and her decorating posts. It has inspired me to do this post on our deck 'refresh'. I say refresh, because I wouldn't classify it as a renovation. Now onto the good stuff. Here is the deck, looking the way it has for the past 8
months.
 
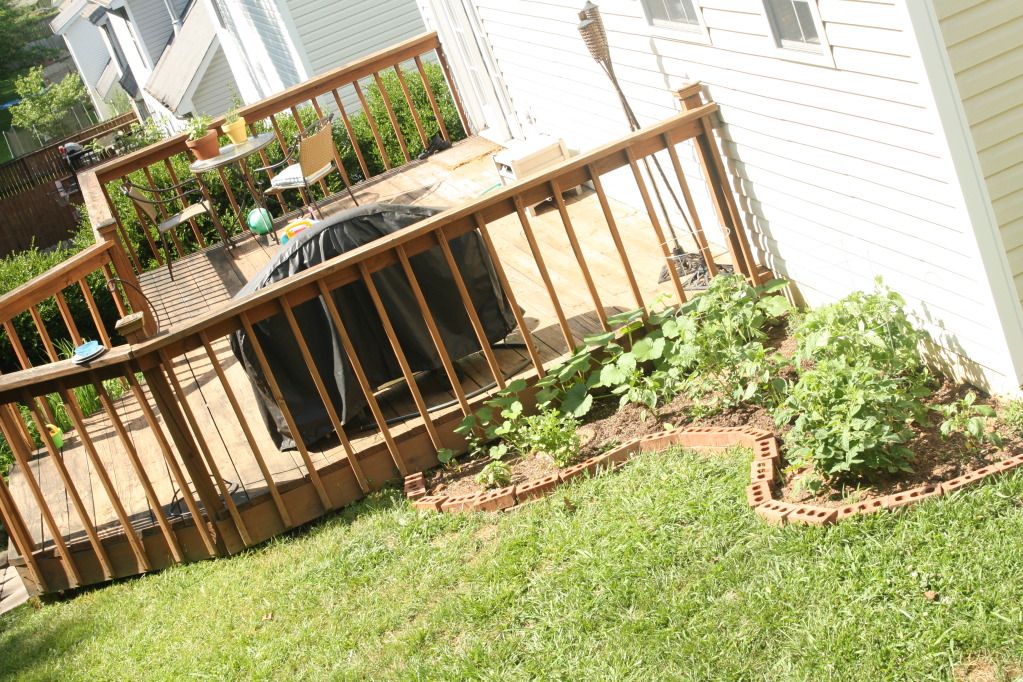
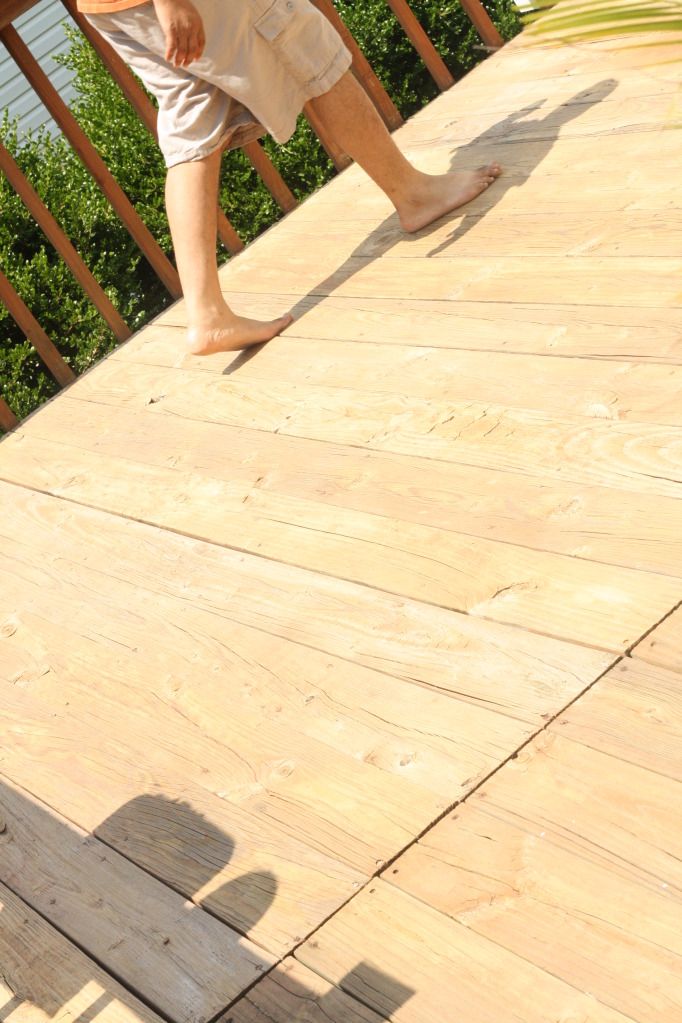
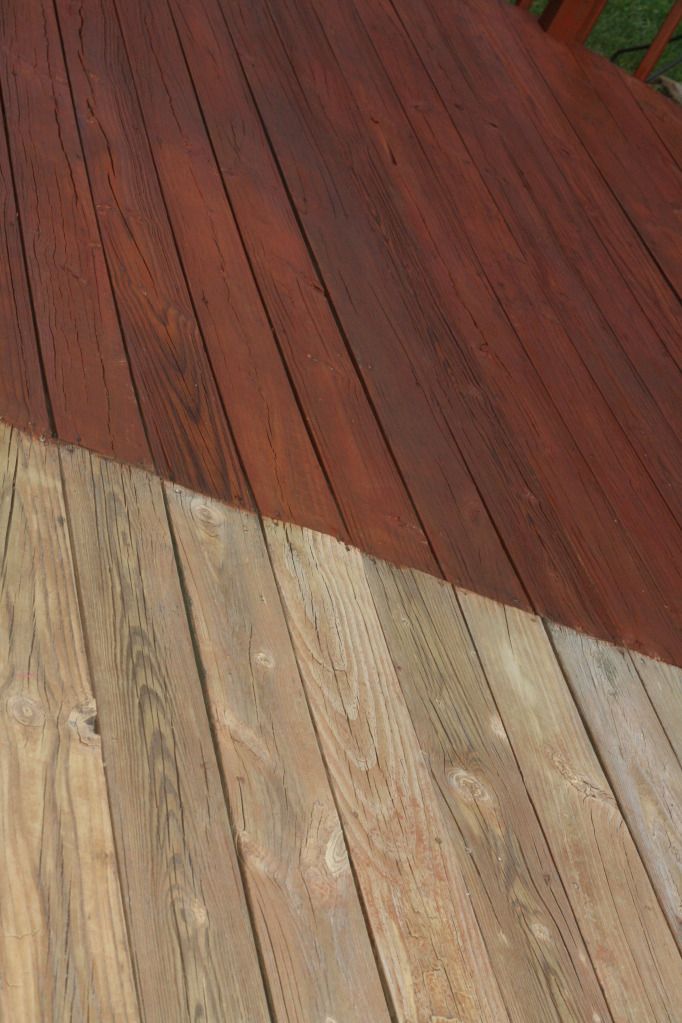
Andrew decided to scrub and stain it. It was looking pretty rough and dirty.   I cant remember what brand we used, but we used a washcloth to apply a fairly cheap eco friendly deck cleaner. (My vegetables are growing along the deck).Then we used a heavy duty brush, and scrubbed it. All.
Aye Aye Aye.
  

Here it is after the scrub:


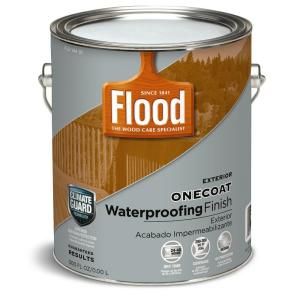
 We chose this stain, as most required 2 coats and this one only required one, I highly recommend it!

 We stained all of the rails first , and then did the actual deck last. We applied a fairly thin layer, using regular brushes. Here she is halfway stained. Quite a difference.


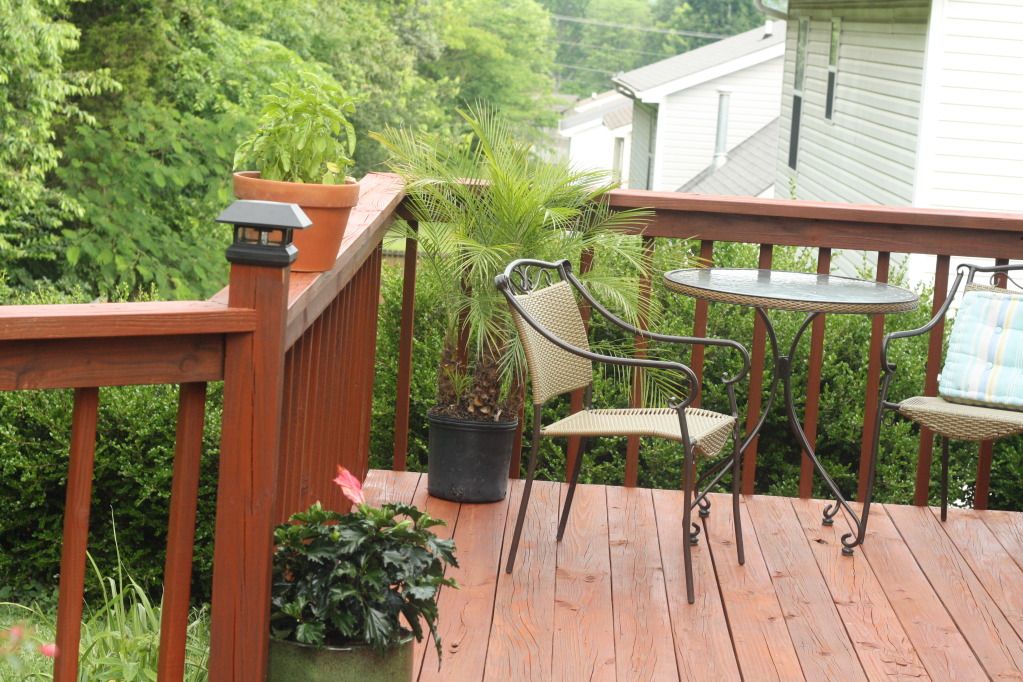
We also replaced the post caps, we found these solar caps at Lowes for about $4.88 each. Super pretty once it gets dark! We still had the same table on the porch this week. We got some plants : The pygmey palm is my favorite, a steal at home depot for $9. The large hibiscus was about $10, we already had the pot. Looking better...

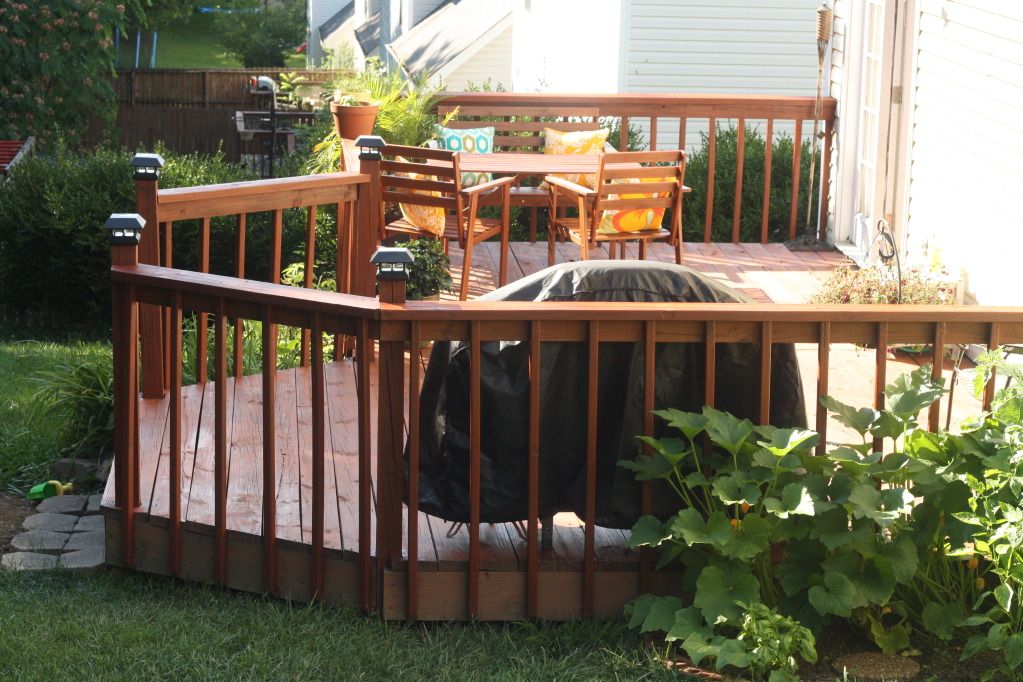
And then some long lost friends made a trip to Atlanta with us, and bought us the table,bench,and 2 chairs that I was pining over at Ikea. 4 adults, a toddler, and the giant box riding back to Knoxville was interesting. The table looked like this http://www.ikea.com/us/en/catalog/products/90055696/ . We used our leftover redwood stain, and stained the table and chairs as soon as we got a chance. The wood was treated , but not really waterproofed, So we stained it the moment we got a chance. We are almost done, but I need pillows! So I searched, and couldnt find 4 pillows that I liked for less than $60. Ouch. So I decided I'd buy some cotton calico from hobby lobby, make my own pillows in the prints I want, and then scotch guard them. Great idea, it would work, but oh so time consuming.
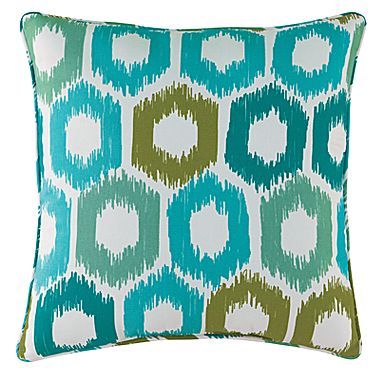
 Then, I happened to be walking throuht JC Penney yesterday , when I saw a lovely beauty, an Ikat pillow, on clearance for $7!! But only one. I quickly googled it, and saw they also had other prints, so I drove over to the JCP on the other side of town, and they had the other prints that I liked, for $7 each also! I was thrilled! For now, my deck is complete. Ya know, til I get that new grill... ;-) . . . Here are the pillows, you may be able to find them for $7 in store right now, but the online price of 2 for $25   is also a steal!