
Maison Blanche's La Craie Paint.
It. Is. Amazing.
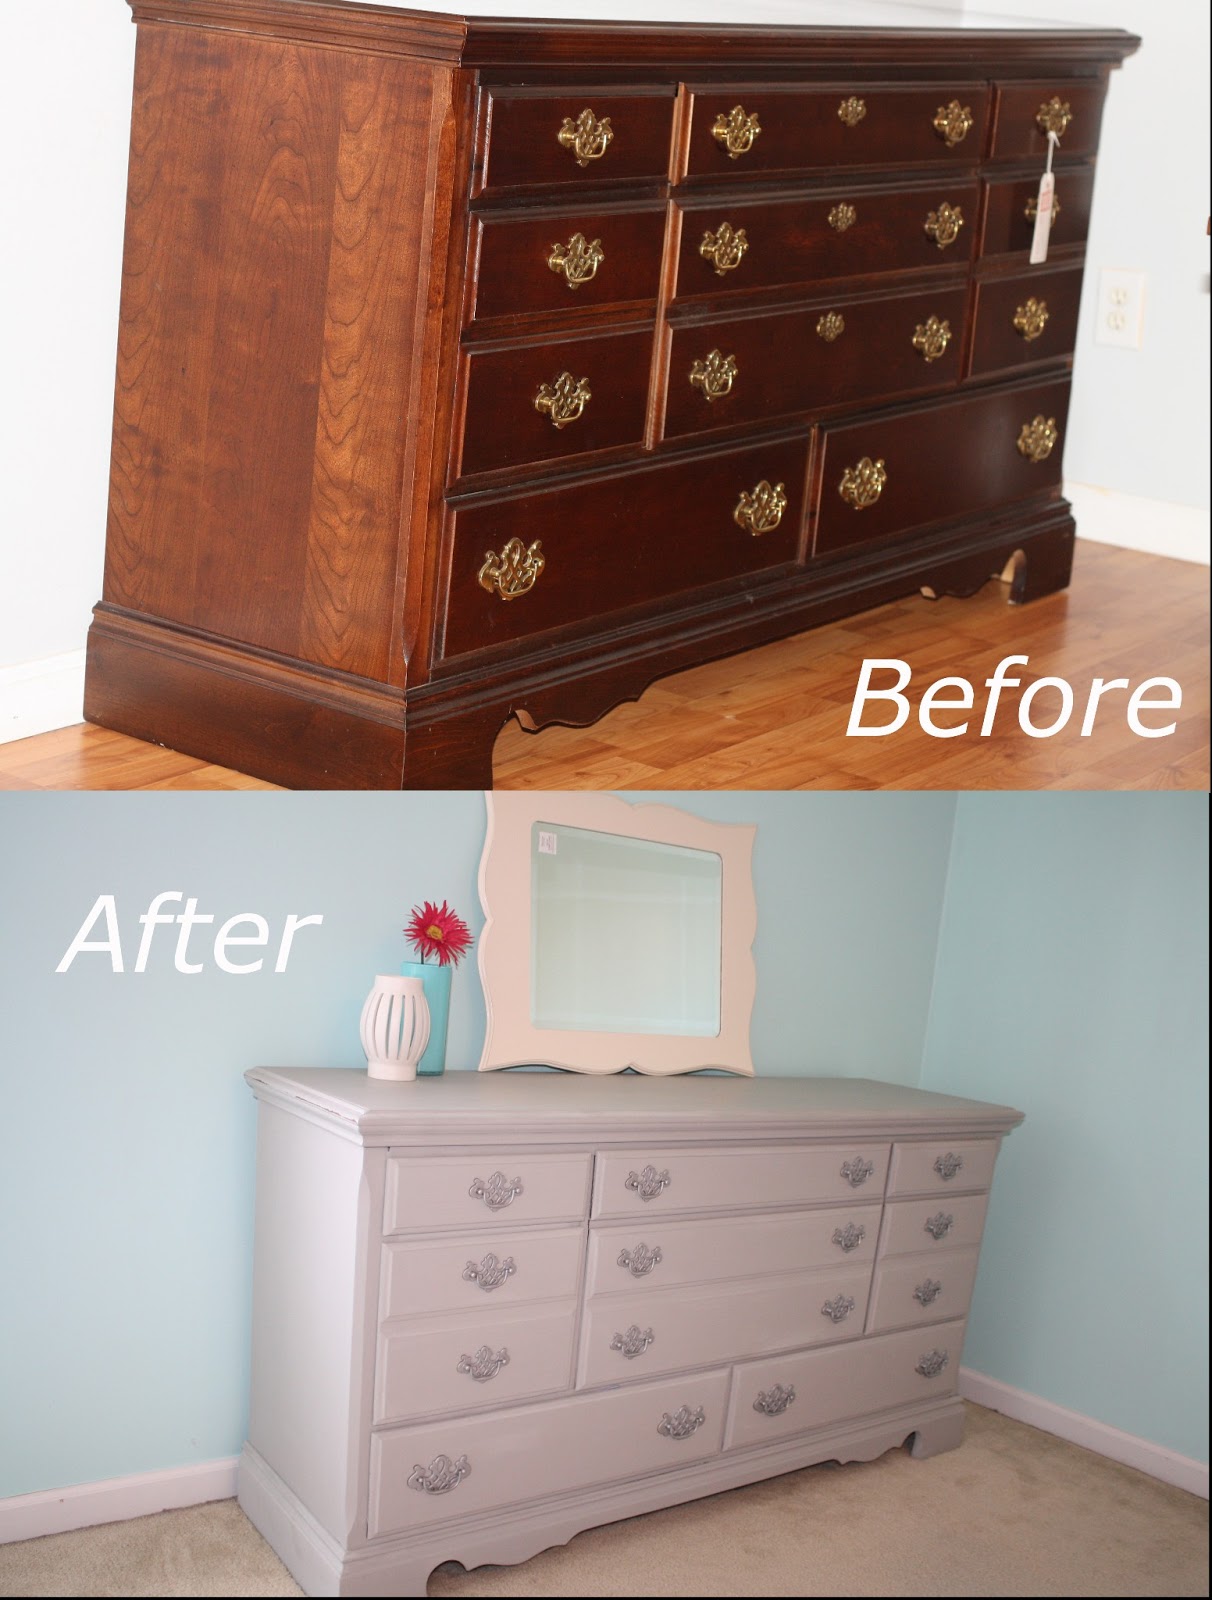
I've been wanting to try chalk paint for a while, and I've heard of another brand that's been used buy a lot of people lately, called Annie Sloan. I was searching Knoxville for a nice dresser to redo or our master bedroom makeover (to be revealed later...) and I ended up in a furniture store here called Consign to Design. I not only found my dresser, but they are also the local retailer for Maison Blanche Paint and Waxes. I asked the girl about the consistency of the paint and I was told that it tends to be thicker than Annie Sloane. I hadn't tried either, but I was definitely going for a more covered look so I figured thicker would be best. I bought the dresser, and also left with a quart of La Craie in Franciscan gray, and a container of Maison Blanche's clear Antique wax.

I started working on the dresser at eight o'clock at night after the kids were put to bed. There is no sanding needed at all, even on this lacquered dresser.
I removed all of the hardware. I swiped a barely damp rag across the front of the drawers where the hardware was removed, just to remove the dust that had built up.
I spread a painting drop cloth out, since I was working in the living room. It was freezing in the garage.
I shook the can quite a bit to get it mixed up well, and then we stirred the paint.
I was advised that it was good to use a Purdy brush, and though I'm sure it's great to use one if you have one, I did not. I was coming in right on budget for my dresser and didn't feel like spending another $15 on a brush. I used a cheap $3 economy brush from Lowes.

I first applied a very thin, and I mean, very thin, layer of paint, all over the dresser and drawer fronts. I used so little paint that you could barely tell there was any missing from the can. If you were painting a lighter color piece of furniture, or if you weren't going for a very covered look, you could have possibly skipped this. I wanted to be sure that it wouldn't end up streaky though. You can see it looks pretty rough here, but for the teensy tiny amount of paint used, the coverage is astounding.


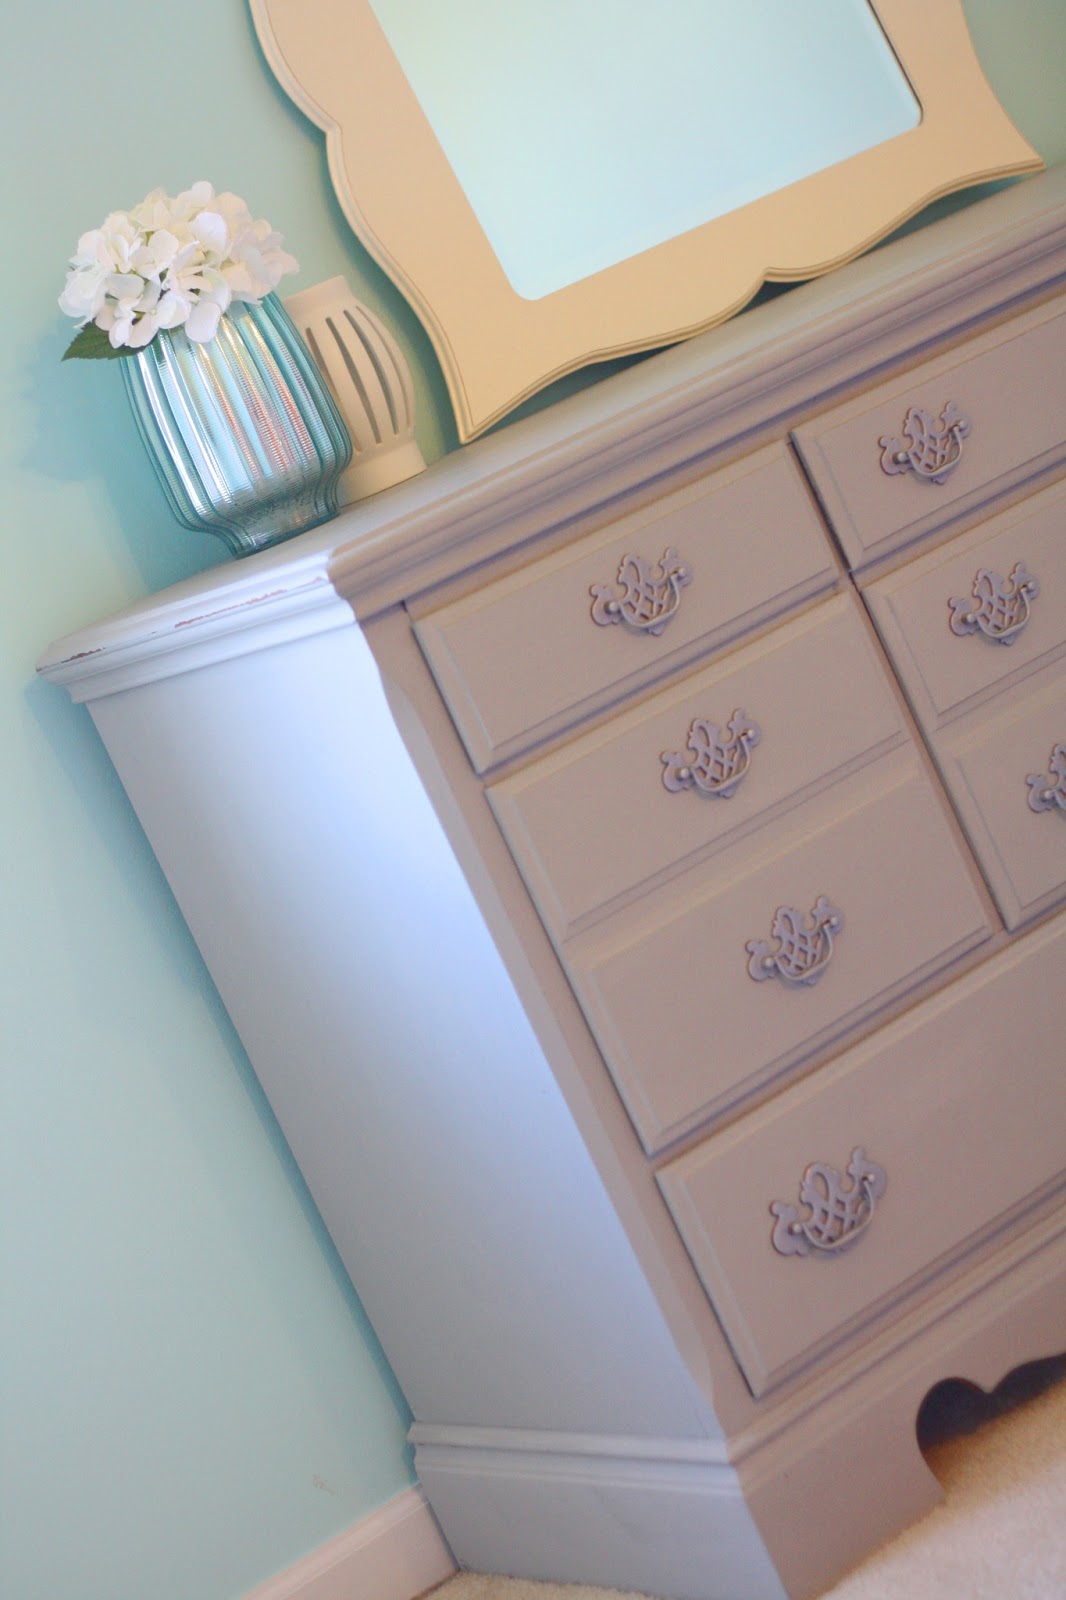
The next morning I took my clean brush, and applied the wax. It is firm, as you can kind of see in the picture here. I just swipe the brush over the wax a few times, and then swipe it onto the dresser.

It just ever so slightly leaves a color difference, so you can tell how smooth it is going on. They also sell a brown version of the wax if you are going for a more weathered or distressed look.

Once the wax was applied, I let it sit for about 15 minutes, and then quickly buffed over the surfaces with a dry rag.
I spray painted the hardware with some Rustoleum metallic flat nickel.

We put the hardware back on, and it was ready to move to our room!


Besides making sure he doesnt Pet supplies wholesale suffer because of the cold weather, you also have the option to dog supplies wholesale make him look stylish, and here is where a faux fur coat comes in play.
ReplyDelete