Pageviews past week

Powered by Blogger.

Monday, March 24, 2014

Maison Blanche Kitchen Cabinet Makeover!


We bought this house about 2.5 years ago, and the kitchen had builders grade oak cabinets.  I have longed to paint them, and scoured the internet for ideas on how to easily do that over the past couple of years.
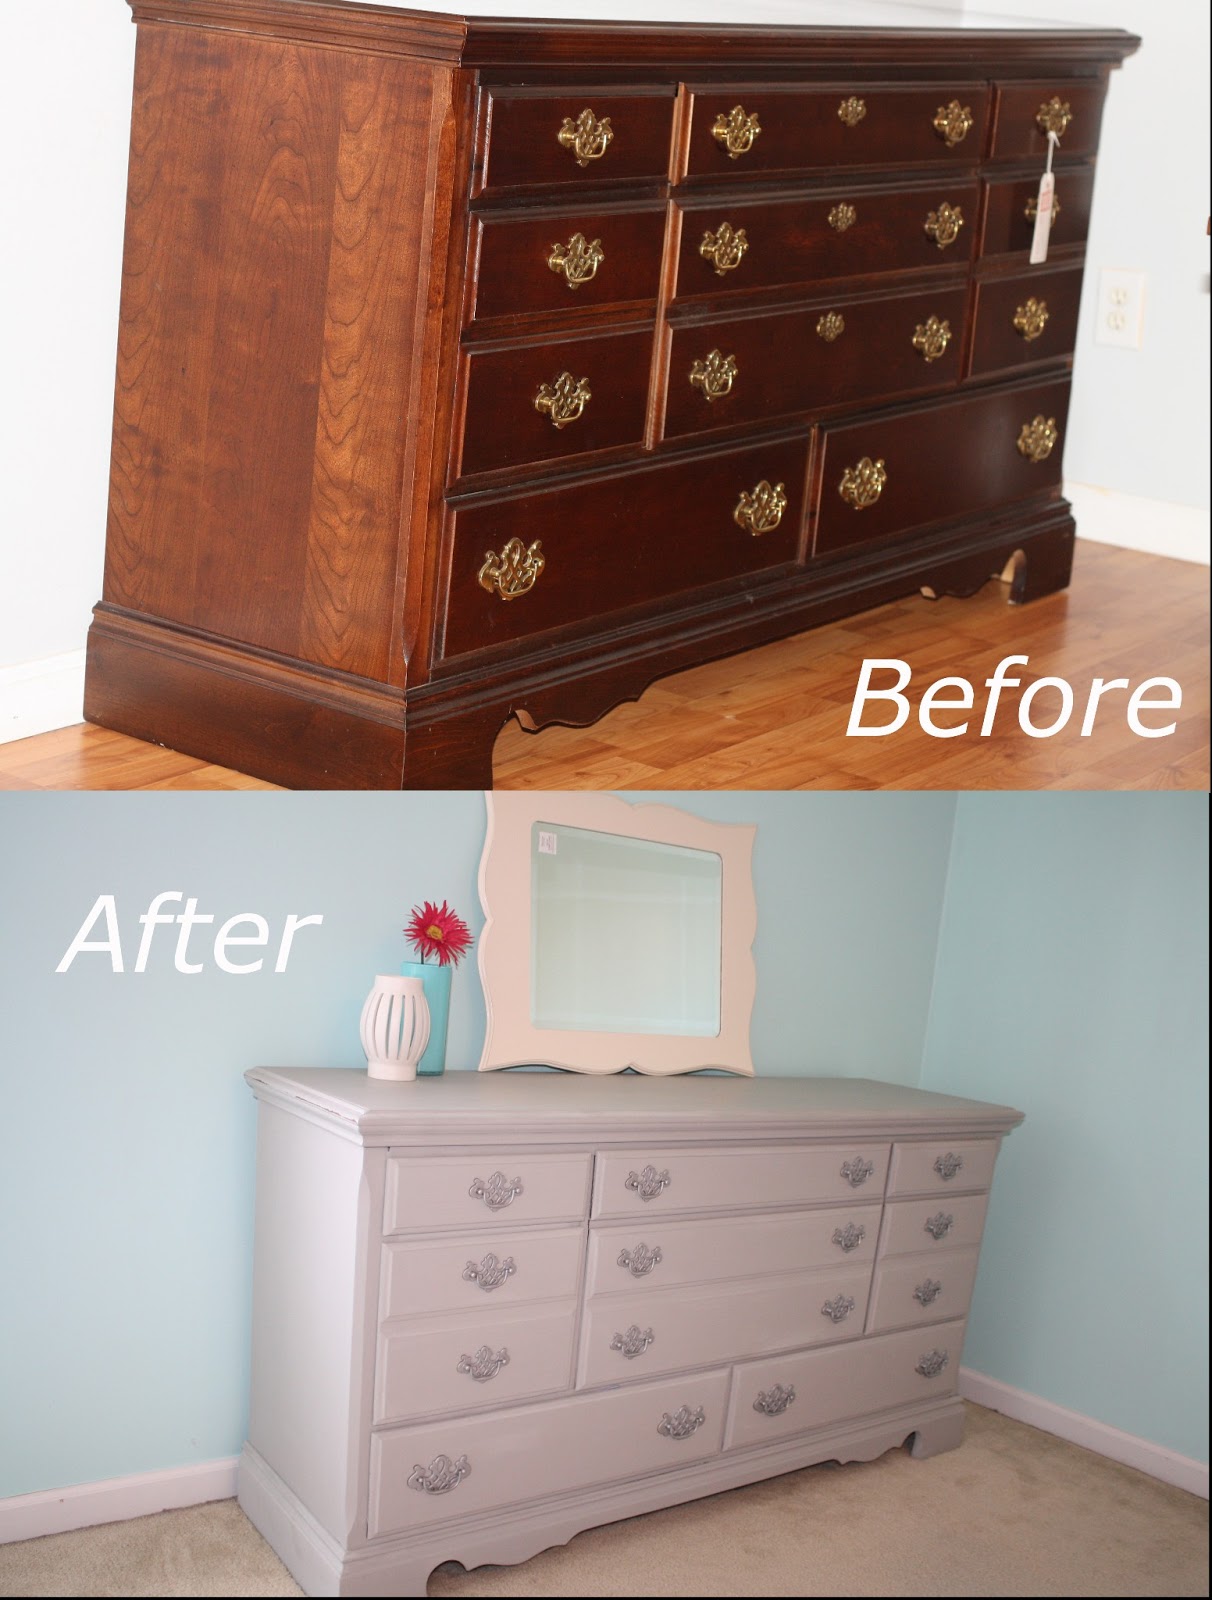
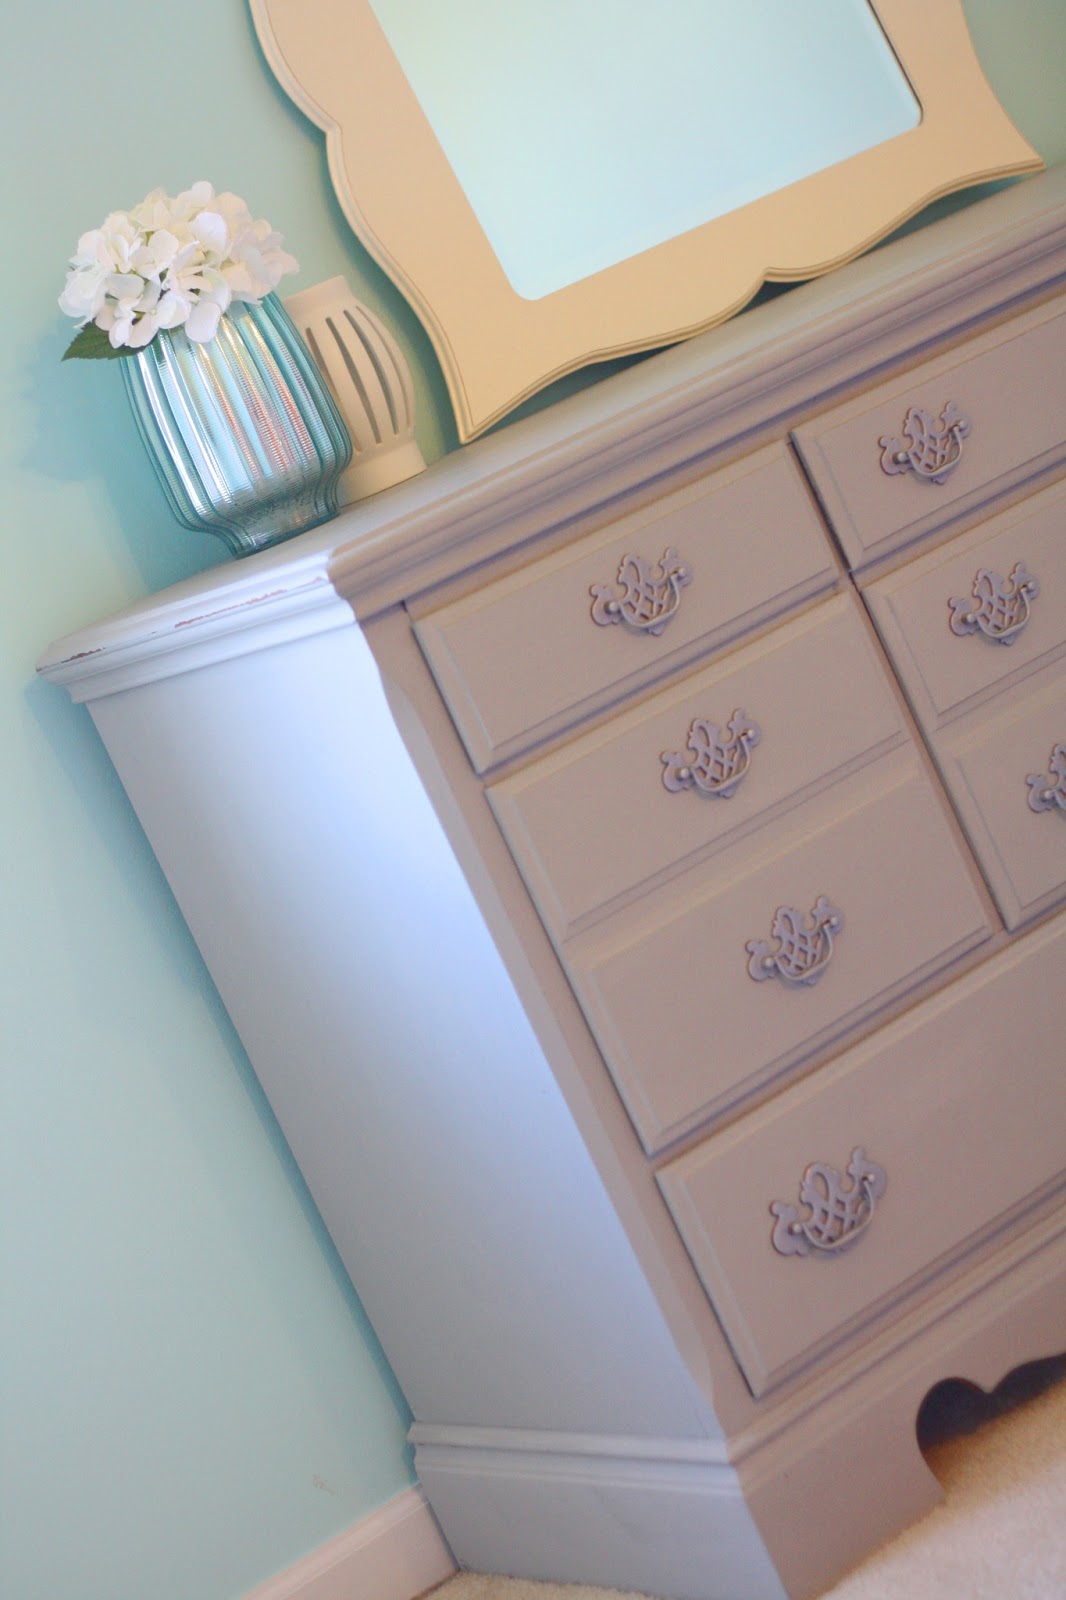
It was when I  refinished a dresser a year ago, that I realized chalk paint might be our best bet. 
The thought of being out of a kitchen for possibly weeks while taking care of our 3 and 5 year old was almost enough to make me like those oak cabinets as they were (almost, still not quite enough).
Using Maison Blanche's la craie paint on our dresser was so super easy, I finally dove head first into doing the kitchen!

Here are some pictures right after we bought the house:


Dark, boring, small... a lot of words come to mind.

Here are most of the supplies we purchased:

 2 quarts of Maison Blanche Silver Mink furniture paint
Maison Blanche Satin Varnish
A 2 inch angled Purdy brush
Painters tape
A drop cloth
Behr ultra plus paint with primer in Milkpail by martha stewart
Rustoleum Satin Nickel spray paint for the hinges
Cabinet drawer pulls
Cabinet knobs
Clorox wipes

I took all of the cabinets off of the hinges and scrubbed them really well with the wipes, if there are any grease spots remaining your paint will yellow in spots.  Then they all got wiped down with a damp cloth to be sure there was no remaining soap residue.
Once they had time to dry (I took that time to run to the store for supplies), I applied a coat of paint to all of the doors and trim, and once the doors were dry I applied the paint to the back of the doors.
This paint is very very quick drying, so you need to work quickly, but it meant that by the time I had my first coat done I was ready to go back and do the second coat.
Once the second coat was on, the paint needed at least 24 hours to cure.  I made note of which pieces were finished earlier than others so I could start varnishing asap. At this point, the silver mink color was lighter and not nearly as neutral as I expected, I was worried, but carried on. Once I started applying the varnish the color of the paint changed to the color I was actually expecting. ***Happy Dance ( and a glass of wine)*** The varnish was the consistency of milk, and was very easy to apply.  The only issue I had was occasional drips forming, and this was really a non issue.
The first coat of varnish also dries very quickly, and then our second coat was applied.
My lovely husband drilled and installed the hardware.  I spray painted the existing hardware.  And we jointly painted the kitchen and adjacent laundry room/half bath.   It took 3.5 days and very little sleep, but we were finally finished!  (For now!  The lighting, sink, faucet, flooring, and eventually appliances need replaced too, but this is a big starting step!)


We are so happy with the results! 

Thanks for visiting!
If you have any questions about the process just let me know!

Monday, February 18, 2013

Maison Blanche Chalk Paint Tutorial ~ Dresser Redo

  I'm about to share one of my new favorite products with you!

Maison Blanche's La Craie Paint.

It. Is. Amazing.

I've been wanting to try chalk paint for a while, and I've heard of another brand that's been used buy a lot of people lately, called Annie Sloan.  I was searching Knoxville for a nice dresser  to redo or our master bedroom makeover (to be revealed later...) and I ended up in a furniture store here called Consign to Design.  I not only found my dresser, but they are also the local retailer for Maison Blanche Paint and Waxes.  I asked the girl about the consistency of the paint and I was told that it tends to be thicker than Annie Sloane.  I hadn't tried either, but I was definitely going for a more covered look so I figured thicker would be best.  I bought the dresser, and also left with a quart of La Craie in Franciscan gray, and a container of Maison Blanche's clear Antique wax.

I started working on the dresser at eight o'clock at night after the kids were put to bed.  There is no sanding needed at all, even on this lacquered dresser.
I removed all of the hardware.  I swiped a barely damp rag across the front of the drawers where the hardware was removed, just to remove the dust that had built up.

I spread a painting drop cloth out, since I was working in the living room.  It was freezing in the garage.

I shook the can quite a bit to get it mixed up well, and then we stirred the paint.

I was advised that it was good to use a Purdy brush, and though I'm sure it's great to use one if you have one, I did not.  I was coming in right on budget for my dresser and didn't feel like spending another $15 on a brush.  I used a cheap $3 economy brush from Lowes.

I first applied a very thin, and I mean, very thin, layer of paint, all over the dresser and drawer fronts.  I used so little paint that you could barely tell there was any missing from the can.  If you were painting a lighter color piece of furniture, or if you weren't going for a very covered look, you could have possibly skipped this. I wanted to be sure that it wouldn't end up streaky though.  You can see it looks pretty rough here, but for the teensy tiny amount of paint used, the coverage is astounding.
I let the first thin coat dry for about 30 mins, it was such a small amount of paint that it dried amazingly fast.  I  then started on the next coat.  I applied the paint fairly heavily, as I wasn't going for too much of a distressed look.  The paint went on extremely easily and smoothly.  I let it dry overnight, and it was dry by morning.

The next morning I took my clean brush, and applied the wax.  It is firm, as you can kind of see in the picture here.  I just swipe the brush over the wax a few times, and then swipe it onto the dresser.

It just ever so slightly leaves a color difference, so you can tell how smooth it is going on.   They also sell a brown version of the wax if you are going for a more weathered or distressed look.

Once the wax was applied, I let it sit for about 15 minutes, and then quickly buffed over the surfaces with a dry rag.

I spray painted the hardware with some Rustoleum metallic flat nickel.


We put the hardware back on, and it was ready to move to our room!


Sunday, February 3, 2013

{Meal Plan and New Recipes}

I'm a little late this week, but here's the plan for this weeks meals.
We are waiting for the superbowl to start and I'm ready to start eating!

{Chicken marsala with mashed red potatoes and green beans.  }
http://www.womenshealthmag.com/nutrition/chicken-recipe

{Superbowl food-  Buffalo chicken dip , guacamole and soft pretzels.  }
      Buffalo chicken dip:  1c Franks buffalo sauce, 8oz soft cream cheese, 1c cheddar cheese, chopped cooked chicken, 1/4c bleu cheese (optional).  Mix all and bake at 350 till bubbly. 
      Pretzels:  This recipe, but bring water and soda to a boil and drop the dough in for 30secs to 1min, then remove. 
http://www.food.com/recipe/auntie-annes-pretzels-copycat-59462

{Chicken baked with peaches, brown rice, corn.  }

{Quinoa mixed with organic sauteed black beans, corn, onion.  Topped with avocado, cilantro and salsa. }

{Trader Joe's Mandarin orange frozen chicken mixed with broccoli and rice.  }

{Chicken, pepper, onion, pineapple kabobs with a Chickpea, spinach, tomato side and French bread }
http://mrsbrechtl.blogspot.com/2012/03/chickpeas-or-garbanzo-beans.html

{Chicken artichoke pasta with French bread }
This recipe with organic whole wheat pasta:  http://www.yumsugar.com/Recipe-Chicken-Artichokes-Angel-Hair-10967770
This French bread recipe: http://www.dealstomeals.blogspot.com/2009/03/blog-post_09.html

Breakfast:
Organic cereal, oatmeal, Greek yogurt pancakes, eggs and homemade 'mcmuffins'.

Lunches and snacks:  PBJ's, ham sandwiches, crackers, mangos, bananas, apples, cookies, yogurt. 

Thursday, January 24, 2013

*Weekly Meal Planning*

I'm getting back on track this week, we really did eat last week, but we had snow days so our meal plan was all over the place! 

This week I'm going with an easier menu, I'm getting a little burnt out with cooking for what feels like hours every afternoon. I think a week or two of easier but healthy meals will take a load off of me, and we can all use that sometimes, right?

{ Roasted chicken with herbed quinoa and green beans. }

{ Spelt pasta with garlic marinara and chicken meatballs, with a salad. }

{ Quinoa with black beans, corn , onion, avocado and salsa.  }

{ Black bean and sweet potato chili over quinoa. (We will probably have leftovers on a night that is rushed.) }

{ Salad with grilled chicken, avocado, cucumber, tossed with some of the black bean and corn quinoa. }

{ Vegetarian hot dogs with broccoli. }

{ Ground chicken burgers on homemade buns with baked sweet potato fries. }

    For breakfasts we will be having oatmeal, cereal, and Greek yogurt pancakes.  Check out this recipe for the pancakes, they are GREAT!  ( Thin the batter out a little with some almond milk, milk, water, what have you...) 
http://www.familyfreshmeals.com/2013/01/greek-yogurt-pancakes.html

For lunches, the kids will eat PB sandwiches of various sorts (jelly, banana, honey..) Mac and cheese, fruit, crackers, etc.   We aren't very creative for lunch.

I will have curry chicken salad on flax crackers or a protein shake.   Check out the curry chicken salad recipe here : 
http://www.familyfreshmeals.com/2013/01/curried-chicken-salad-for-lunch.html#more-2289

And that is that! 

On a separate note ,  my almost 4 year old has been enrolled for pre K this fall!  How time flies!  When he was born it seemed like an eternity before we would be thinking about school, and now it's right around the corner.   Thankfully, of my two boys, he will be the easiest when it comes to starting school.  He begs to go all the time!   And I'm getting excited, looking at little backpacks, lunch boxes, snack bags, lunch ideas..
It's going to be a whole new world for both of us!
Look at that cute face... 


Monday, January 7, 2013

** White Whole Wheat Bread - THE BEST! **

I have been trying to bake most of our bread lately, as we've been trying to eat more natural foods, and that adds up to more $$.  Though reducing the cost of breads isn't a lot, it's something.

I have tried several whole wheat bread recipes, and some have been okay, but just okay.  They always end up too crumbly , dry or dense.  I've tried using my bread machine for the kneading. I've tried kneading by hand.  The only thing I've found that helped was using a recipe that added white flour to the whole wheat, and I'm trying to stay away from that. 

Until this recipe.  I've made two batches, two different ways, and both were amazing.  And yes ,  it's a recipe for 100%whole wheat! And yes again, it involves NO kneading!

To rise , I turn my oven light on  then turn the oven to WARM / 170F , for about 10 seconds, just until the coils start to get warm, then I turn it off.  It creates a cozy, warm environment for the bread to proof, and the oven keeps the warmth in.

Make sure you are using newer yeast as this recipe doesn't call for it to be proofed before mixing it in.

This recipe makes two loaves, but it's easily halved. 

If you aren't sure of the difference between sticky and tacky, look here first :   http://yumarama.com/1644/sticky-vs-tacky-dough/
You do not want your whole wheat dough to be as dry as a dough with white flour would be.

I highly recommend using King Arthur's White Whole Wheat flour.  I much prefer the texture over regular whole wheat.

I have incorporated up to half white flour , half white whole wheat in this recipe when I ran out of white whole wheat. It yielded a lovely , old country style bread.

Ingredients:

2 3/4 cups hot water

1/3 cup olive oil, any oil is fine

1/3 cup honey (I've used white sugar)

2 tablespoons molasses (use pancake syrup if you don't have molasses)

1 tablespoon salt

7 1/2 cups of 100% whole grain wheat flour

2 tablespoons dry active yeast

1         Place the first five ingredients in the bowl and mix.

2          Add: 2 Cups 100% White Whole Wheat Flour. (to cool the water and end up with warm dough) Mix then add 2 Tbs of Dry Active Yeast.

3          Add: 4 Cups of 100% White Whole Wheat Flour.

4          Mix until the consistency is some what even. Then continue to slowly add flour 1/2 Cup at a time until the dough quits sticking to the sides of the bowl. It should be tacky to the touch. The trick is to have enough consistency to stand up with the least amount of flour so the bread will be fluffy. Do not exceed 7 1/2 cups of wheat flour. You can trade one cup of wheat flour for one cup of all purpose white if you wish. Don't over mix or the bread will be tough.

5        When your dough is finished, leave it in the mixer, cover the bowl and let it rise for about 30-45 minutes. The dough will be larger but it doesn't need to double.

6         Grease two bread pans with Crisco. You can also flour the pans to reduce sticking.

7         Mix the dough again just enough to knock it down at least close to the original size.

8          Drop the dough on a floured surface so you can work the dough and shape it. Shape it with your hands to make a nice ball getting enough flour on it so it isn't sticky. Divide the ball in half and do it again. Shape the loaves by turning the dough under it's self over and over. When the dough is shaped the sides and ends will be sealed and all you will see is a nice oblong shaped loaf with smooth sides and top. Drop the loaves in your bread pans and let them rise until almost doubled. Bake in a preheated oven at 350 for 36 minutes. If you forgot to preheat 41 minutes. (gas oven).

9        When done turn the bread out of the pan to a rack to cool. You can eat it right away (a great time for real butter) don't wrap it until completely cooled. (Condensation will make it soggy) Put in tinfoil to store on the counter. If you put it in the refrigerator it will turn into a rock.

Original recipe Here : http://www.food.com/recipe/100-whole-grain-wheat-bread-181106

Thursday, January 3, 2013

* Weekly Menu Plan *

I want feeling too creative today, so here it goes.. 

*Tofu curry with whole grain brown rice, salad  and steamed broccoli. *

*Veggie Dogs (trader joes) on homemade buns with baked beans and homemade slaw. *

*Buffalo chicken (mock Mac n cheese) quinoa with salad.*
http://traceysculinaryadventures.blogspot.com/2012/10/buffalo-chicken-quinoa-mac-and-cheese.html

*Chicken ranchero taco soup with corn muffins.*
Chicken , cooked
2 cans organic black beans, rinsed and drained.
1 can chili ready diced tomatoes
1 can cream of chicken soup
1 small can enchilada sauce
1 can corn (or heated frozen/fresh)
1 can chicken broth
1 packet of ranch dressing mix
Throw together in the crock pot and cook on high for 4 hours.  Garnish with Cheese and Cilantro if desired.

*Chicken burgers with sweet potato fries and organic mixed steamed veggies. *

For lunch the kids have PBJs (we bake the bread) , Mac and cheese, leftovers, etc
For my lunches , I have salads with grilled sweet apple chicken sausages , and protein shakes.

Right now I'm working on cooking the Tofitas (tofu fajitas) with onions, peppers and mushrooms. And a side of black beans and corn.  From last weeks menu.
And I'm starving!

Tuesday, January 1, 2013

Whole Wheat Pancakes

This is my go to pancake recipe.  The use of White whole wheat makes it a healthier alternative, but you can also use white four for one of the best pancakes you've ever eaten!

1c Flour (White Whole Wheat)
1 t baking powder
1/2 t baking soda
1/2 t salt
2 T sugar
1 c buttermilk
1 egg
2 T melted butter

Wisk the flour, baking powder, soda, salt and sugar in a large bowl 
Beat the milk and egg together.
Mix the wet ingredients into the dry, when partly mixed add the melted butter.
Then add 1/4 c or so of water , till your mix is a thinner pancake batter with no lumps.  Cook on a griddle. 
We love to mix chopped banana or frozen blueberries into the batter.

These are delicious!